Photo by Jeremy Bishop on Unsplash
Ever since I fell in love with surfing I thought it would be amazing to build my own boards. I considered it for years, but there were so many reasons in my head that made it seem impossible and not worth trying. All the shaping videos I had watched made it look like the shaper was just sculpting the foam by look and feel. They magically formed the rails to be perfectly symmetrical and hydrodynamic. But after stumbling upon some amazing resources, I have learned that there is a science and process in the art of board building. Those guys that have shaped hundreds of boards can shape rails by look and feel, but as beginners, there are simple steps that anyone can follow to shape rails and build a board that will look good and surf good. In this post I’ll give a broad overview of the steps I followed in building my first board and the post a link for the resources that helped the most in each step. I will try to give some tips i found helpful and tell you where I messed up so you can hopefully avoid those mistakes.
Why I Waited So Long
In my head, shaping a board seemed like an unattainable task for so many reasons:
- I fixed countless dings on my boards in the past. Even the smallest repair took hours and the repair always looked like garbage. There’s no way I could work with fiberglass and resin successfully on a much larger scale.
- I watched a lot of shapers on youtube and it looked like they were sculpting the boards and guessing on how much to take off. How in the world would i be able to do that and still make something that was symmetrical.
- The fumes are too strong The only place i have available is my garage and I don’t want my wife, kids, and neighbors to hate me.
- Getting started is just too expensive I don’t have the powertools i see shapers using.
What I Learned After Building My First Board
- Working with resin and fiberglass and on a blank was not much more difficult than fixing a small ding. In some ways I would gladly take glassing a whole board to repairing a ding.
- Although there are very talented shapers that can eyeball and shape a blank just by look and feel, this is not how you have to start out. There are techniques that many shapers use to make shaping more of a science. You can make measurements and and lines to follow that will help your board look like a surfboard you will want to ride when you are done.
- I use epoxy resin in my garage and it has barely any smell or toxic fumes. Many shapers still use Polyurethane resin and dont mind the smell/fumes, but epoxy resin has become a lot more popular in the shaping world and it has barely any smell/ fumes to worry about. There are pros and cons to epoxy but in my opinion the pros far outweigh the cons.
- For your first few boards it’s recommended to start off with little to no power tools. So for me, the starting costs were very low. The only power tools I used were a Dremel for the fin boxes and a shop vac. I am slowly acquiring power tools, but they are not a requirement when starting out.
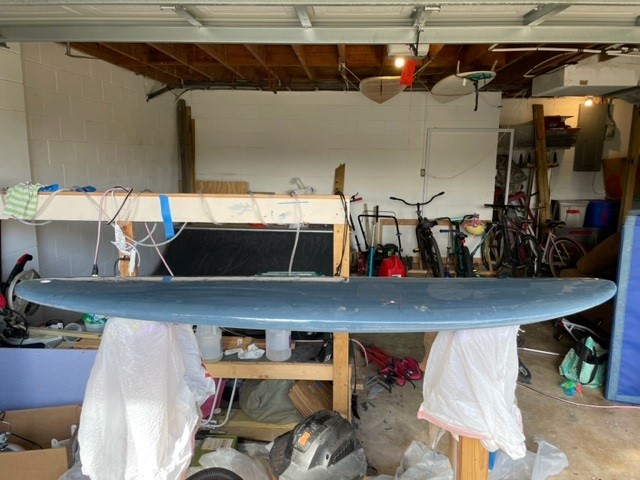
My Shaping Setup

I started and still shape my boards in my very messy garage. I don’t have special lighting or a separate glassing stand. I built a simple stand from the blueprints i found on Greenlight Surf Supply. I would love to have a proper setup one day, but for now I don’t really need it.
In the beginning, I mentioned being nervous about glassing and using resin in my garage, but with epoxy resin this was not an issue. When I laminated my 7’3″, which used a lot of resin, I couldn’t smell anything outside the garage. Even in the garage the smell was very faint.
Greenlight Shaper Stand Plans.
Tips:
- The most important aspect I learned to make sure your stand is level. By making your stand level you can be sure your blank is even and level as you start sanding it down.
Resources I used
Greenlight Surf Supply (Use code “MadSheep” for a 10% discount)
Greenlight is an online store, but also provides great guides, charts and diagrams that I use all the time.
US Blanks
This site has the catalog for every blank available.
Blending Curves
This site offers free templates for board outlines and rockers.
Swaylocks
This a good forum for shapers. If you have a question it has most likely already been posted and answered here by a large community of shapers.
The Tools that I Used
- Printer
- Rigid Shop Vac (optional)
- N95 Masks (this mask was cheaper than a respirator but did not fall apart as fast as the cheap dust masks)
- Latex gloves
- Stanley Surform
- Mini Spokeshaver
- 60 grit sand paper
- 80/100/120 sand paper pack
- 180/200/? sand paper pack
- Hand Saw
- 3m spray adhesive
- Plastic drop cloth
- Small Digital scale
- Resin bottle caps(Optional but very helpful)
- Shaper square
- Wooden Dowel
- Small ruler
- Dremel Tool with Routing kit (but if you don’t already own a dremel I would just recommend getting a cheap trim router from harbor freight to start off)
- Tape
- Multi size Tape pack (I prefered this taping method(mentioned in step#4) because it was cheaper and allowed a little more control on my tape lines)
- 3m 233+ green tape ( most shapers prefer this tape)
- Chip Brushes (I needed 4 total)
- Resin Spreaders
- Level
- Razor Blades
Tools that I made or collected
- 2×4 rough sander block
- I glued 60 grit sandpaper on a 24″ long 2×4
- small sanding block from scrap foam
- I glued 100 grit sandpaper to a scrap piece of foam
- plastic container cups
- I just saved plastic food containters and used these to mix resin
- Sand Weights
- I took a small and medium sized bag and filled them with sand. These were great soft weights to hold my blank or board in place on the stand.
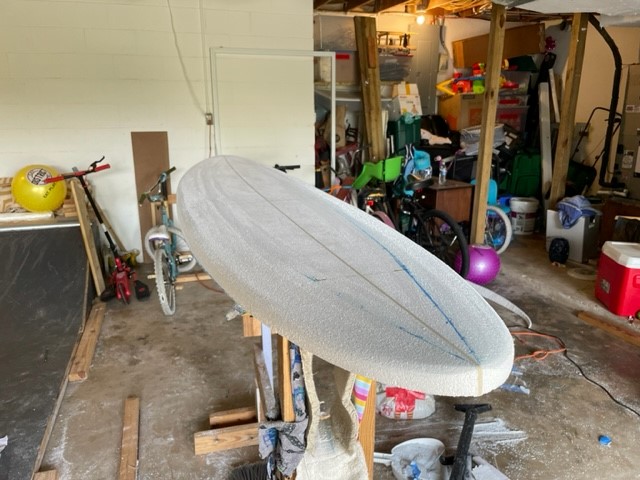
Step #1 Design the board You Want to Build
This is where I used US Blanks and Blending Curves to find my board blank and outlines. This step was hard for me because I could think of 100 different types of boards that I would want to try to build. After watching this video I realized that it was good to start off with a simple design for my first. I am a shortboarder and didn’t own anything longer than 6’3″ but ended up a 7’3″ midlength egg. I am glad I took the advice and started with this shape. It was very forgiving and allowed me to make and then correct mistakes without drastic consequences.
I stayed away from Greenlight blanks because i live in florida and the shipping costs were not worth it. I ended up driving an hour and a half to the US Blanks warehouse in Melbourne, FL. Now looking back I should have gone with greenlight and chosen the option to ship a blank that was not glued together. This would have been cheaper and saved time driving.
Step #2 Foiling and Shaping the Blank
Foiling
Once you get your blank the first think you need to do is sand it down to the desired thickness. This is where you will use your long 2×4 sanding block. You will evenly take off foam on the deck and bottom with long even strokes. Although you may be tempted to use a smaller planer or device, but do not try this. If you do this, you will most likely end up with an uneven blank that will take a lot of time to correct. I made this mistake and fortunately was able to correct. I would also advise not trying to mess with the rocker. Try keeping the rocker profile of the blank for your first board.
Cutting the Outline
Trace your outline on the blank and using your hand saw, cut just outside the outline all the way around. The goal is to keep the saw at a 90 degree angle. I struggled with the outline at first and was afraid it was too wavy. Although it was wavy, I started sanding it relatively smooth to the original outline. I have heard that all shapers deal with the issue of hills and valleys (wavy outlines) and are constantly trying to perfect imperfections. So don’t worry if you are experiencing this too. You will be sanding these surfaces several at almost every stage and this will even out the imperfections.
Rail Bands
This was one of the parts that I was most nervous to attempt, but after watching Andrew explain the process I was much more confident.
A small ruler, wooden dowel, and weights were crucial to performing this step. Drawing out the rail outlines and measurements made this part so satisfying to do myself. I was super impressed that the end product was symmetrical and resembled the rails of a board off the rack.
Along with Andrew’s video, this Rail Band Design page provided by Greenlight is really helpful.
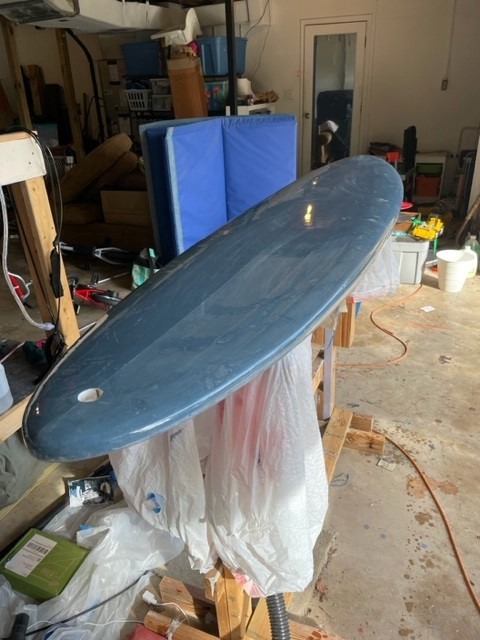
Step #3 Fin Boxes (If you are using Futures/FCS II/ FCS Fusion)
I put in Future Fin boxes for my two side fins and the process was relatively easy. I used the shaper square to mark fin placement. I did not want to spend the money on a kit so I just routed out the holes with my dremel and a razor blade. With patience, this technique works just fine for your first board.
I bought my Future Fin boxes at here at Greenlight Surf Supply
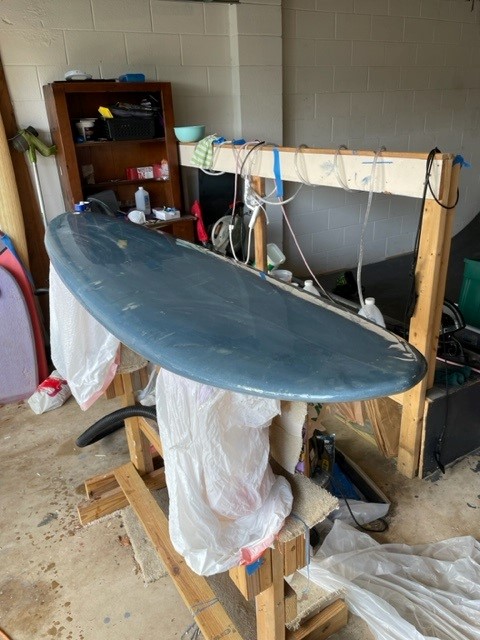
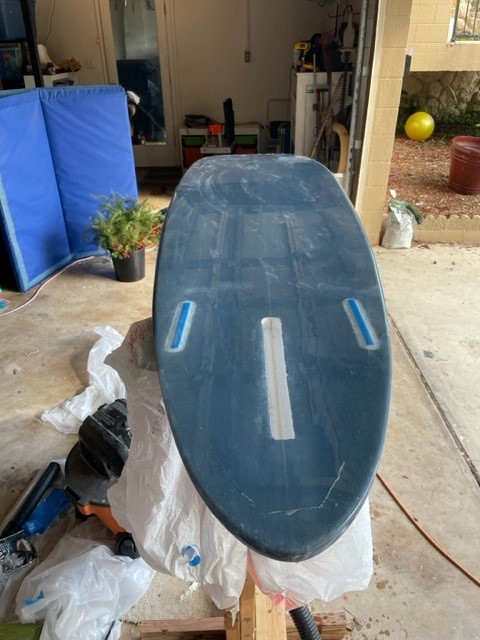
Step #4 Fiberglassing (Laminating)
This was a very intimidating step in the process since my only experience with resin before was fixing small dings. Things I learned when laminating for my first time.
Tips:
- Using a scale is necessary to getting the right mixture
- After you mix your resin don’t leave it all in the cup too long or it will start to kick much quicker. I did this on my first batch and wasted a large batch of resin (I also almost burned my hand because it got so hot)
- The Cut Lap method was much easier than free lap. I tried Free lap on my first attempt and it required so much more clean up afterwards.
- Make sure you tape for cut laps is secure or it will fall off while laminating.
- I know two ways to ensure your tape stays on the foam:
- Use two rolls of tape with different thicknesses (1/4″ and 1/2″. Start your outline with 1/4″ tape. Then apply the 1/2″ over the 1/4″ tape. The 1/2″ tape will stick much better to tape than to the foam. I found this trick on swaylocks and has worked really well for me for even the cheapest blue painters tape.
- Buy the more expensive Green 3m tape. I think a lot of shapers use 3m 233 or 2214
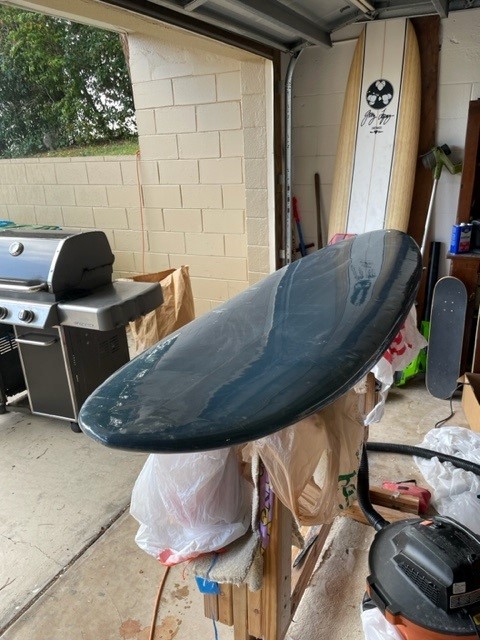
Step #5 Glosscoat and Sanding
Step #6 Fin Box and Leash Plug(and vent plug) Install
After laminating and applying the glosscoat you will need to install the leash plug, vent plug (EPS blank), and Fin box. If you have an EPS blank it will need a vent to let off steam that could be trapped inside. If steam is not released then there is a high chance of delamination. Fortunatly, Greeenlight makes a leash plug/vent plug combo that vents any gas trapped in the board.
Bahne Box – Greenlight Surf Supply
Vented Leash Plug – Greenlight Surf Supply
Conclusion
So far I have shaped two boards that I am proud of and ride all the time. I hope you can use some of these resources and tips to start building your own boards.


Leave a Reply